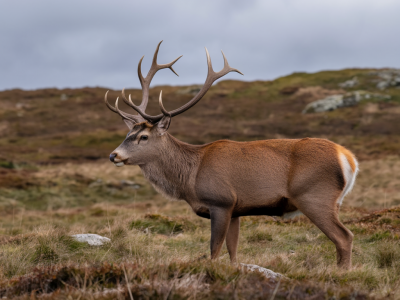
The Jurassic Coast is one of my favourite places to poke along the shoreline — dramatic cliffs, fossil-bearing rocks and a rich, ever-changing intertidal world that rewards a slow, curious pace. I love a low-tide scramble: equal parts hiking, light scrambling and careful rock-hopping, with pockets of sheltered rockpools revealing small, thriving ecosystems. But planning a safe, responsible trip takes a little thought. Below I walk you through how I plan a low-tide scramble on the Jurassic Coast and share a practical rockpool wildlife checklist to help you spot and identify what lives between the tides.
Choosing a stretch and checking access
Start by deciding which stretch of the coast you want to explore. Popular places like Kimmeridge, Charmouth, Lyme Regis and Lulworth all have different characters. I pick spots based on a mix of rock features, accessibility and the kind of wildlife I hope to see — sandier bays often have burrowing animals and shrimp, while rocky headlands hold anemones, crabs and limpets.
Always check access points and parking before you go. Some car parks close seasonally or have limited spaces. If you plan a linear walk between two points, arrange transport or be ready for a longer return route. National Trust and local council sites sometimes have information on dog restrictions and protected areas — read those notes and respect closures.
Tide planning and timing
Tide is everything for this kind of day out. I never attempt a low-tide scramble without checking the tide tables and planning my route around the lowest tide window. The idea is to arrive as the tide begins to ebb and to be back well before it starts to flood the route. On steep cliffs and narrow ledges, the margin for error is very small.
I use two main sources: the official tide tables from the UK Hydrographic Office and a reliable app such as XTide or MagicSeaweed for quick reference. My rule of thumb is to aim for the lowest tide minus 1–2 hours for exploring rockpools — this gives maximum exposed area while leaving a safe buffer for return. If the route includes narrow ledges that will be submerged as the tide rises, add an extra safety margin.
Navigation and route notes
Even when you’re on obvious coastal terrain, I carry a map (OS Explorer 1:25k where relevant) and a compass. I’ve walked many sections of the Jurassic Coast enough to know the key landmarks, but fog, low sun and tide race can quickly make things confusing. I also download an offline map on my phone (OS Maps or Avenza) so I can confirm my location if needed.
Before scrambling down onto the shore, I plan escape points — stretches where I can get back up to the cliff path if the tide turns or conditions worsen. I avoid tight gullies and caves that can trap you with the incoming tide, and I make a mental note of the safest low-angle slopes for ascent.
Essential gear for a low-tide scramble
I aim to pack light but sensibly. Here are items I never leave without:
| Item | Why I bring it |
|---|---|
| Approach shoes / boots | Grip on wet rock, ankle support |
| Waterproof jacket | Wind and rain protection |
| Dry bag (5L–10L) | Protect camera and spare clothes |
| Gloves | Hand protection from barnacles and sharp rock |
| First aid + whistle | For minor injuries and signalling |
| Phone + offline maps | Navigation and tide check |
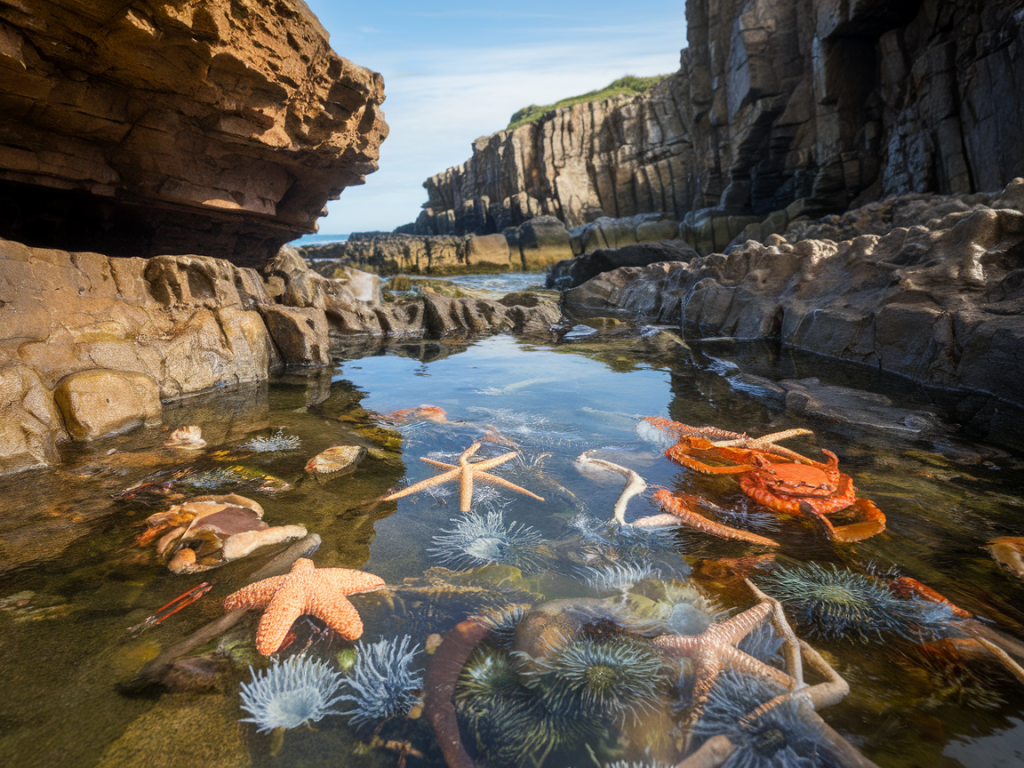
Rockpool wildlife checklist: what I look for
When the pools reveal themselves I slow down and get low to the rock surface. A handheld magnifier or a small macro lens helps. Here’s the checklist I use — it covers common and interesting species you can often find on the Jurassic Coast.
Ethics and handling
I follow a strict “look, don’t touch” approach. If I need to move a rock to see underneath, I only do so if it’s small and I can put it exactly back in place. Many intertidal species are fragile: anemones, for example, retract and can be damaged by prolonged exposure. Take photographs, notes and perhaps a sketched map of the pool’s layout, but don’t remove animals, shells with living inhabitants, or seaweed unless it’s permitted for educational purposes and you have the right permissions.
Keep dogs under control. Birds and seals can be stressed by close approaches, and many shorebirds feed at low tide — maintain distance and use binoculars for observation. If you find beach litter, I pack a small rubbish bag and carry what I can out; it’s a small action that helps wildlife and the next visitor.
Photography tips for rockpools
Shooting rockpools is about patience and light. Early and late low tides with soft side-light give the best colour and texture. A polariser reduces surface reflection and often reveals hidden details beneath a thin film of water. For macro subjects I use a 90–105mm macro lens; for wider pool scenes a 16–35mm or 24mm prime gives context and reflections.
Keep your camera protected in a waterproof pouch or dry bag and clean boots before kneeling to steady a shot — algae can smear lenses. I use a low tripod or rest the camera on a rock for long exposures, and I always check the background to avoid distracting blown highlights from wet rock.
Emergency thinking and common hazards
Tide is the main hazard: rising water can trap you quickly. If you’re unsure about a section, don’t proceed. Slippery algae and barnacle-covered rocks cause many cuts and sprains — gloves and sticky soles help. Cliffs can drop unexpectedly and are fragile; avoid edging too close, especially after rain. If someone injures a limb, keep them warm, apply basic first aid, and if needed call 999 and ask for the coastguard. A whistle or VHF app can speed up locating you if visibility is poor.
On the Jurassic Coast I’ve had some of my best wildlife encounters and learned the value of planning, patience and respect for the tide. Follow the checklist, pack the essentials, and leave the shore as you found it — and you’ll come home with memories, photos and stories rather than regrets.