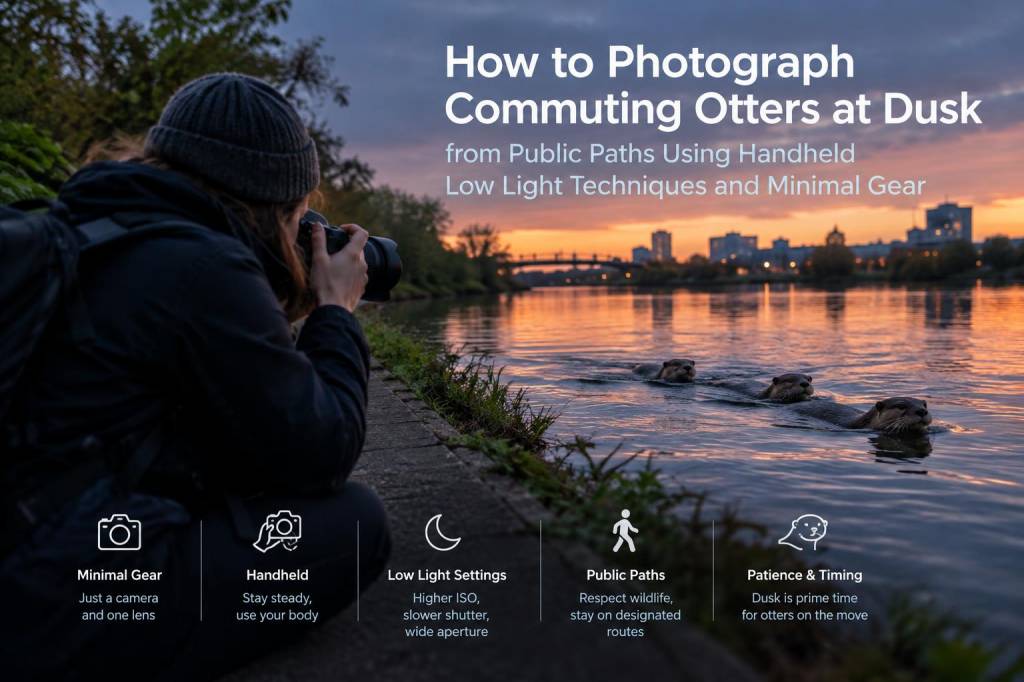
Watching otters emerge at dusk is one of my favourite reasons to linger on a riverside path. They’re curious, quick and often photogenic — but shooting them by hand from public paths, with minimal kit and limited light, is a challenge. Over years of evening watches I’ve developed a practical, ethical approach that lets me get usable images without disturbing the animals or hauling a tripod through muddy fields. Below I share the techniques that work for me: camera settings, movement and behaviour tips, simple kit choices, and the soft skills that keep both you and the otters safe.
Reading the situation: timing, place and behaviour
Before you raise the camera, spend time watching. Otters have routines: they often hunt close to banks at dusk and dawn, come ashore to groom or feed young, and use predictable runs along reedbeds and rocks. I try to arrive an hour before dusk to scout likely spots from the public path. Look for fresh spraint, slides in mud, and prey remains on stony shelves — these give away favoured exits and entrances.
Light is everything. The best time for handheld low-light shots is the blue hour — after sunset when there’s enough ambient sky light to silhouette an animal and still keep shutter speeds reasonable. If the sky is too dark, you’ll be forced into extremely high ISOs or slow, unusable shutter speeds.
Minimal kit that actually helps
You don’t need a full wildlife rig to photograph otters, but a few thoughtful choices make every shot easier:
Carry as little as possible — heavy gear increases noise when you move, and you’ll be more tempted to use flash if you’re tired of holding it steady, which you must avoid around otters.
Handheld settings that work
These are the starting points I use at dusk; adjust depending on the available light, your lens and the otter’s movement.
| Situation | Shutter | Aperture | ISO | AF mode |
| Slow-moving otter on bank | 1/250s | f/2.8–f/4 | 1600–3200 | Single AF or small AF point |
| Otter swimming or hunting | 1/500–1/1000s | f/2.8 | 3200–6400+ | Continuous AF (AF-C) |
| Silhouette or low light portrait | 1/125–1/250s | f/2.8–f/4 | 800–3200 | Single AF |
Why these values? Otters move quickly and unpredictably; if you aim for any kind of freeze you need 1/500s or faster for splashes and lunges. For calmer behaviour, 1/250s often suffices and lets you keep ISO lower for cleaner images. Use the widest aperture available to maximise light — this also gives a pleasing background separation, which helps hide busy bankside vegetation.
Autofocus and exposure strategies
Use continuous AF (AF-C) for moving subjects and a small cluster of AF points rather than a wide group. Otters are low to the ground and partially submerged, and centre-weighted AF helps keep focus where you want it. Back-button focus is a game-changer for me — it separates focusing from the shutter and allows quicker, more deliberate framing.
Expose for the animal, not the sky. In twilight the sky can blow out while the otter is underexposed — dial in +1/3 to +1 EV exposure compensation where necessary, and check your highlight and shadow warnings. Shoot RAW: you’ll need the extra latitude to recover detail in the body or water reflections during post.
Noise, sharpening and ISO management
High ISO is unavoidable sometimes. I push it to 6400 on my Sony A7 or 3200 on APS-C Fujifilm before seriously considering a “noisy” compromise. Modern denoise tools (Topaz DeNoise, DxO PureRaw, Lightroom’s Luminance slider) let you clean images well while preserving detail. In-camera noise reduction for JPEGs is fine if you’re not processing RAW, but I always recommend RAW for critical shots.
Composition and storytelling
Get low. When you can kneel or rest your elbows on a fence, you bring the camera closer to the otter’s eye level — this makes images more intimate. Include context: a curve of the bank, reeds, or a splash adds narrative. Capture behaviour: a fish in the mouth, a grooming pose, or a wake line tells more than a static profile.
Silhouettes can be powerful at dusk. Place the otter against a bright patch of sky or reflective water and underexpose slightly to get the shape crisp. Use negative space when the animal is moving into or out of frame — it gives a sense of direction and movement.
Movement, approach and ethics
Move slowly and keep noise to a minimum. Stop well before you think you need to, and let the otter choose to approach or ignore you. If it alters behaviour — freezes, dives repeatedly, or rushes away — you’re too close. Back off quietly and try again from a different angle or distance.
Never use flash. Otters are easily spooked and sudden light can disorient them. Similarly, avoid calling, baiting with food, or trying to coax them into view. These are public-path observations; feeding wildlife is both unethical and often illegal.
Clothing, safety and practical tips
Post-processing notes
I shoot RAW and usually do three things during edit: lift shadows and midtones carefully, apply gentle denoise targeted to chroma noise, and add local contrast to the otter’s eye and fur. Be wary of oversharpening — in low light, this amplifies noise. If you’ve captured a splash, consider a slight crop to increase perceived reach and drama.
Finally, share responsibly. When posting location details online, be mindful of sensitive sites — avoid precise grid references for known holts, and focus on the experience and behaviour rather than giving away breeding sites to casual disturbance.
Photographing otters at dusk from public paths is a balancing act between technical skill and quiet patience. With modest gear, thoughtful technique and a commitment to respect the animals and their habitat, you can come away with images that capture the magic of those first waterways becoming alive at twilight.