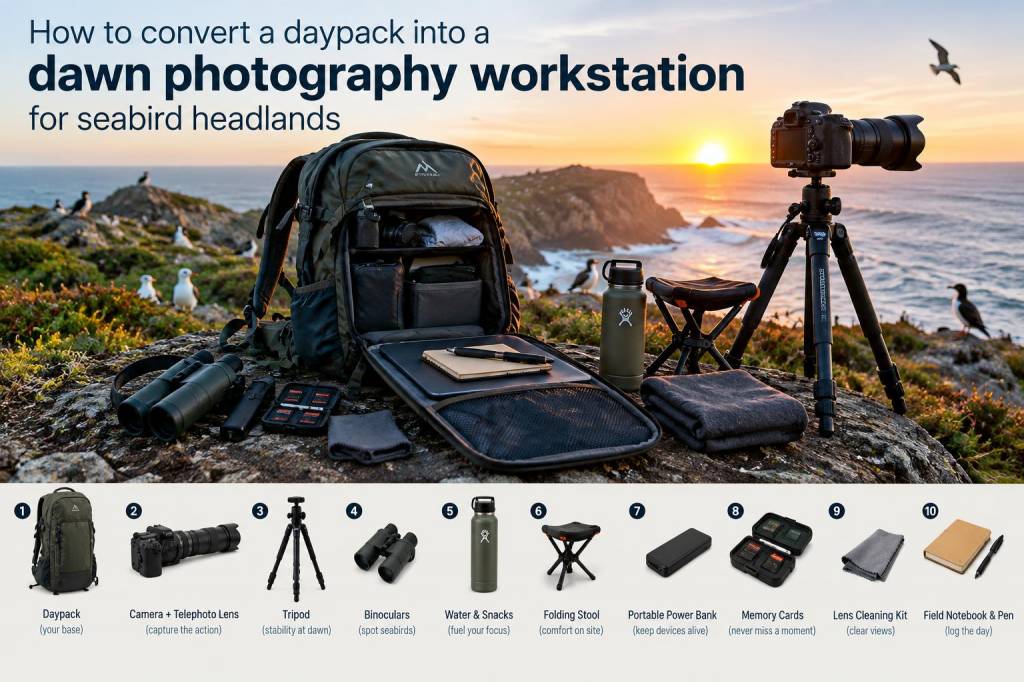
Dawn on a seabird headland is the kind of light and sound that rewires the day: cliffs glow, guillemots and kittiwakes fill the air, and the cold is worth every shiver. Over the years I’ve learned that staying mobile yet ready is the trick — a full field suitcase is often overkill, but an empty daypack is useless when the light peaks and the birds line up. Here’s how I convert a simple daypack into a compact, efficient dawn photography workstation designed specifically for seabird headlands. I’ll give you the exact 10-item layout I use, where everything goes in the pack, and the practical reasons behind each choice.
Why a daypack and not a photo backpack?
A dedicated photo backpack has its place, but when I’m walking coastal footpaths, hopping fences, and squeezing through narrow cliff-top paths, a low-profile daypack (20–30L) wins. It’s lighter, less conspicuous to wildlife and walkers, and quicker to shoulder. The goal is a balance: carry what I need for early-morning seabird work without being weighed down for the return hike.
My guiding principles
When I pack, I follow three rules: accessibility, protection, and minimal disturbance. Accessibility means I can get my most-used items with one hand or without taking the pack off. Protection means fragile gear stays padded and dry. Minimal disturbance means I can move quietly and set up without scaring birds — no clattering tripods or bright headtorches shining into nests.
The exact 10-item layout (and why each item matters)
Below are the ten items I carry for seabird headland dawn work, followed by a suggested placement inside a 25L daypack with a few organisational pieces (padded camera cube, dry bag, and small utility pouch). Items are chosen to let you photograph, observe, and leave no trace.
Packing map: where everything goes
Use this layout in a typical 25L daypack with a top lid pocket, front pocket, and main compartment. I keep a small (<5L) dry bag inside the main compartment to group weather-critical items.
| Top lid / quick-access pocket | Headtorch, notebook, pen, and hand warmer |
| Front pocket | Binoculars (in padded sleeve), small first-aid, multi-tool |
| Main compartment — upper layer | Camera cube with camera + attached lens (ready to grab), spare batteries in small pouch |
| Main compartment — lower layer (dry bag) | Waterproof shell (rolled), power bank, secondary lens/extender |
| External loops / side straps | Monopod or folded GorillaPod attached to side; quick-release carabiner for gloves |
How I use the layout in practice
Arrive at the headland while it’s still dim. I keep the camera cube near the top so I can unzip, raise the camera, and shoot silhouettes or backlit fly-bys within seconds. If I expect a long vantage setup (for example, photographing kittiwakes leaving the cliff), I’ll mount the monopod or GorillaPod and set the camera on it; for quick handheld tracking I’ll leave the monopod strapped to the pack for a later rest. The binoculars live in the front pocket — scanning with bins before committing to a setup saves battery life and avoids unnecessary disturbance.
Settings and shooting workflow for dawn seabird work
I usually start with the following baseline and adjust on the fly:
Don’t be afraid to bracket or expose for the highlights — seabird white plumage and bright sky will fool metering. I use +1/3 to +2/3 EV on white birds to keep detail in feathers.
Minimising disturbance — practical steps
Seabirds are sensitive at dawn and during breeding. I follow these habits:
Weather and kit maintenance
Coastal mornings can change fast. I keep the waterproof shell in a dry bag at the bottom so I can pull it out without unpacking everything. Salt spray and fine sea mist are harsh on glass and electronics — wipe lenses with a microfibre cloth as needed and store any wet gloves in the outer mesh to dry. After a day on a saline headland I rinse zips and tripods with freshwater back at base to remove salt deposits.
Why these ten items, not 20?
Every extra item adds complexity and weight; it also increases the chance something will rattle, snag or distract. The ten items above let me photograph dynamic seabird behaviour, record observations, stay safe in the elements, and leave the place as I found it. If I’m guiding or doing a longer expedition, I’ll add a small shelter, more food, and a full tripod — but for solo dawn sessions at headlands, simplicity wins.
If you want, I can suggest exact product models at different price points (budget, mid-range, pro) and show a photo of how I pack my own daypack for a real morning on the cliffs. I can also provide a printable checklist you can slide into your pack to speed up morning prep.