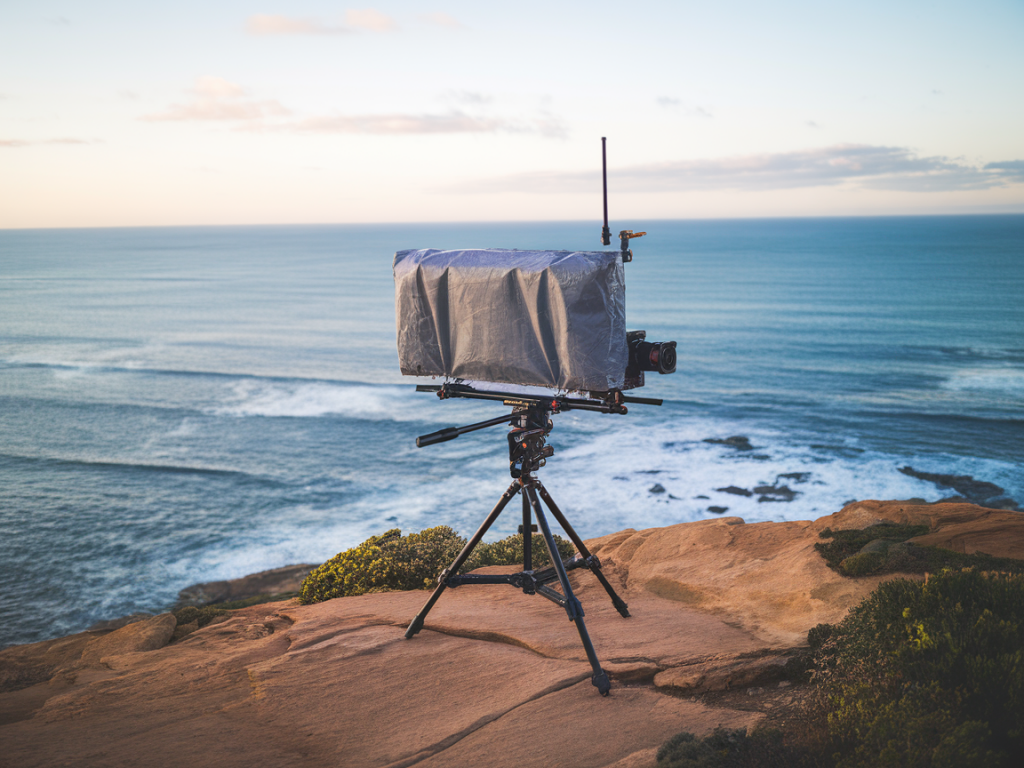
I love shooting cliff-top seascapes and coastal wildlife, but hauling a heavy, purpose-built hide isn’t always practical on a long walking day. Over the years I’ve developed a simple, lightweight way to rig a tarpaulin camera blind using eight cheap hardware items you can tuck into a daypack. It keeps me low-profile, protects kit from spray and wind, and gives me flexibility to compose stable, low-angle shots without disturbing birds or other wildlife.
Why a tarpaulin blind?
A lightweight tarp blind is cheap, versatile and incredibly quick to set up. On exposed cliffs where wind and sea spray are constant, a small shelter around your camera helps protect delicate electronics and lets you shoot through a narrow gap to mask human movement. It’s also a good way to get lower to the foreground, stabilise long exposures, or hide a tripod and lens from skittish seabirds.
The eight items I always carry
These are deliberately inexpensive, lightweight and available from any hardware shop or online. Together they weigh less than 1kg and fit into a small stuff-sack.
| Item | Description | Approx cost |
|---|---|---|
| Silnylon/nylon tarp (1.5–2m) | Lightweight tarp or bivvy bag segment; water-resistant and quick-drying. | £10–£20 |
| Aluminium groundpegs (4) | Lightweight pegs for pinning tarp edges — choose short beach pegs or small tent pegs. | £3–£6 |
| Shock cord (2 lengths, 1m each) | Stretchy cord for tensioning and creating bungee loops. | £2–£4 |
| Carabiner clips (2 small) | Non-locking aluminium clips to attach tarp corners or make quick anchors. | £2–£5 |
| Adjustable cord locks (4) | Simple cord stoppers to adjust tension quickly. | £1–£3 |
| Velcro strap or two | For fastening tarp to tripod leg or rock features. | £1–£2 |
| Small sand/shell bag (100–300g) | Reusable mini sandbag or stuff sack filled with sand/pebbles to weigh edges down. | £2–£4 |
| High-visibility micro flag (optional) | A small flag or reflective tab to attach to the blind for safety when needed. | £1–£2 |
How I pack and prepare
I keep the tarp folded with the pegs, cords and bag inside so it’s one quick grab. The shock cord and carabiners double as camera tether safety lines if I’m leaning out for a low-angle seascape. My choice of tarp is important: a silnylon or light ripstop nylon offers a good balance of weather resistance and weight. A 1.5–2m piece gives enough coverage to hide a tripod and me sitting behind it without creating a massive wind block.
Site selection and safety first
Cliffs are unforgiving, so the first thing I do on arrival is scan the area for safe, stable ground. I avoid loose scree, overhanging ledges and any place where a gust could blow me or the blind over an edge. If the tide or weather is changeable, I choose a slightly inland position where I can still see the sea but have a firm footing. Never compromise your safety for a shot — a tripod strap and camera tether are useful, but they’re no use if you’ve misjudged the cliff edge.
Quick rig — step-by-step
This is my go-to method when wind is moderate and I need a low-profile blind fast. It takes under five minutes once you’ve practised a couple of times.
- Unfold the tarp and identify the wind direction. Position the long edge facing the sea so wind flows along the tarp, not into it.
- Stake two pegs at the downwind edge about 1–1.5m apart and attach the tarp corners with the carabiners. If the ground is hard, wedge the pegs horizontally for better hold.
- Use a tripod leg as the main support: stand the tripod forward, and drape the tarp over the head and that leg. Secure the tarp to the tripod leg with a Velcro strap so the opening faces the subject.
- At the upwind side, use the shock cord between two pegs or around a rock to create a taut ridge line. Pass the tarp corner through the cord loop and lock it with a cord stopper.
- Weigh down all lower edges with the sandbag or tuck them under rocks. If the surface has vegetation or turf, use the groundpegs angled into the soil.
- For camera opening, make a narrow eye slit — a horizontal gap about 15–25cm wide is enough for most lenses. If you need a side gap for panning, make it no larger than necessary and keep movement slow and minimal.
- Clip a safety tether from your camera strap to a carabiner anchored under the tarp or to the tripod to prevent accidental drops over the cliff.
Camera placement and composition tips
I often shoot with a low tripod inside the blind, lens protruding through the slit. A ball head set low is helpful; alternatively, use a mini tripod or bean bag on a rock if the ground is uneven. For seascapes I look for a balanced foreground — a splash of wet rock, a ledge or coastal vegetation — and position the slit so I can pan left or right without exposing myself.
Use a remote release or 2s self-timer to avoid touching the camera, and consider a neutral density filter for long exposures of waves. If you’re photographing seabirds, keep exposure and shutter speed in mind: faster shutter speeds freeze flight, but a bit of motion blur on wings can convey dynamism.
Minimising disturbance and ethical considerations
Being hidden doesn’t give licence to disturb wildlife. I maintain a respectful distance, avoid flashing lights near nesting birds, and never move or block access to ledges used by wildlife. A tarp blind can be great for photographing resting or feeding birds, but if you notice change in behaviour — alarm calls, flushed birds or panicked movement — pack up calmly. Wherever possible I use existing features (boulders, grass tussocks) to anchor the blind rather than pegging into sensitive vegetation.
Practical tips and troubleshooting
- Windy days: shorter tarp and lower profile. Use extra pegs and tuck edges under rocks. Angle the blind so wind slides over rather than catching a flat face.
- Rain and spray: orient the opening away from the prevailing spray and keep camera gear inside a dry bag until you’re ready to shoot.
- Visibility to others: use the small high-visibility flag when coast path walkers are nearby to avoid startling them and to stay visible in emergency.
- Condensation: leave a small vent at the top to reduce damp inside the blind on cool mornings.
- Practice at home: set the rig up in the garden or a park so you can get the hang of pegging angles, cord locks and camera positioning before you’re on a cliff edge.
This setup isn’t a replacement for a proper hide in all conditions, but for day hikes and spontaneous cliff-top sessions it’s the best compromise between portability, protection and effectiveness I’ve found. The kit is cheap, light and multifunctional — and once you’ve practised rigging it a few times, you’ll be surprised how quickly you can be shooting steady, low-angle seascapes without leaving a trace on the cliff.