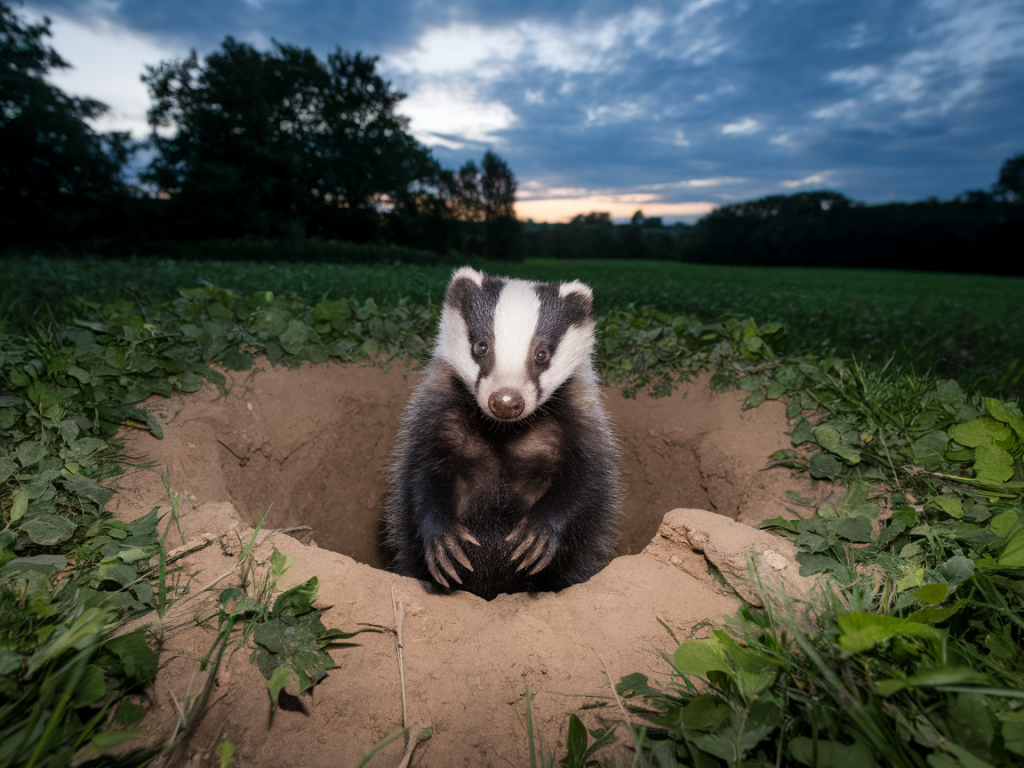
I remember the first time I saw a badger emerge at dusk near a wood I’d been watching for weeks. The light was failing, the air smelled of damp leaves, and I felt equal parts thrilled and nervous — badgers are notoriously wary, and I had no hide. Since then I’ve learned a few practical ways to photograph a badger sett at dusk while keeping disturbance to an absolute minimum. Below I share what has worked for me: scouting, kit, settings, approach and ethical rules I never break.
Scouting and timing: patience beats haste
Before you even think about cameras, spend time understanding the local badger behaviour. I’ll walk the area in daylight for several evenings, noting sett entrances, runways, feeding signs and the direction of approach paths. Badgers follow regular routines — knowing when they typically leave and return (often just after dusk and again before dawn) lets you plan where to position yourself without surprising them.
Try to visit on multiple nights. Weather, moon phase and local disturbance all change activity. I personally prefer nights with thin cloud: enough ambient light to help exposure but not a full moon that makes shadows and spooks wildlife. Rain and heavy wind often mean quiet setts; still, damp evenings can heighten scent and increase detection, so adjust how close you get accordingly.
Ethics first: never risk disturbance
Badgers are protected and stress can affect their health and cubs. These are my non-negotiables:
- Keep distance. If the badgers alter behaviour (looking towards you, stopping normal activities, vocalising), back away and leave.
- No shining lights directly at them. Red-filtered torches for navigation are better, and minimize use of any white light.
- Avoid sett entrances. Never block or approach the main entrance. Photograph from the side or further out where you’re not near runways.
- Don’t feed or bait. That changes behaviour and can cause conflict or dependency.
Choosing your position without a hide
Without a formal hide I rely on natural cover and concealment. Sit low behind a bank, fallen log, gorse, or thick bracken that breaks up your silhouette. I wear muted, matt clothing (greens, browns) and avoid synthetic fabrics that rustle loudly. A lightweight groundsheet or small bivi bag can be useful to sit on and to reduce movements caused by uncomfortable positioning.
Approach from downwind whenever possible. Badgers have a strong sense of smell; even a careful visual approach can be ruined if you’re upwind. I also use extended periods of stillness: move into position early, stay silent and still for 10–20 minutes before expecting anything to appear — habit will make them accept you as part of the background.
Kit that helps (without shouting "photographer")
You don’t need ultra-expensive equipment to get good dusk shots; you need the right combination of reach, stability and high-ISO performance. My usual kit for badger work:
- Full-frame or APS-C camera with good high-ISO performance (Sony A7 series, Canon R series, Nikon Z series or Fujifilm X-T series are all capable).
- Telephoto lens in the 200–600mm range (Sigma/Tamron 150–600mm or Canon/Nikon 100–400mm). Zooms give flexibility to crop later.
- Sturdy tripod (Manfrotto/Benro) and a gimbal or low-profile head for fast framing.
- Remote shutter release or intervalometer to reduce camera shake.
- Headtorch with red filter and a spare battery.
- Optional: small camo net or a poncho for extra concealment; small heatpack in colder months.
Camera settings that balance noise and motion
Dusk is a challenge because you need enough shutter speed to freeze movement while keeping ISO reasonable. I usually start with the following baseline and adjust as needed:
| Mode | Manual or Aperture Priority |
| Aperture | As wide as the lens allows (f/4–f/6.3 typical on telezooms) |
| Shutter speed | 1/125–1/250s for slow-moving badgers; faster (1/500s) if they’re running |
| ISO | Start 1600–5000, push as necessary; aim to keep below your camera’s usable limit |
| Autofocus | Single-point continuous AF or back-button AF with tracking; use wide point only if contrast is low |
| Drive | Low/medium continuous burst for sequences |
Every camera handles noise differently. I’ve pushed an A7-series camera to ISO 10,000 and still recovered usable detail in Lightroom; older APS-C bodies might struggle, so you’ll need a longer shutter or wider aperture in that case.
Low-impact lighting solutions
Never use flash near setts — it can blind or disorient animals. Instead, if you need to boost light subtly, I use one of two approaches:
- Ambient augmentation: position (well away) a low-power LED panel behind natural cover to gently lift the overall exposure without startling the badgers. It must be subtle and diffused.
- Remote spotting: use a red-filtered torch to check frames quietly, then switch it off. Red is far less intrusive but still use sparingly.
Composition and behaviour-led shooting
Badgers are most photogenic when they’re foraging, grooming or interacting. Prioritise capturing behaviour over a perfect portrait — those honest moments are what make images meaningful. Use the telephoto to frame a badger on a runway or next to an entrance, leaving negative space to show habitat. When they move, track smoothly and fire short bursts; overlong bursts produce too many unusable frames and increase camera noise in the group.
When things go wrong: recognising stress
Badgers will show clear signs if they’re disturbed: prolonged freezing, barking hisses, rapid retreat into the sett, or defensive displays at the entrance. If you see any of this, stop shooting, move back quietly and wait at a distance or leave immediately. I’d rather miss a shot than cause lasting disturbance.
Practical checklist before you go
- Scout in daylight and note runways/entrances
- Plan approach downwind and arrive early to settle in
- Wear muted, quiet clothing and sit low
- Bring tripod, long lens, remote release and headtorch with red filter
- Set conservative camera parameters and be prepared to raise ISO
- Never use flash or bait, and always prioritise the animals’ welfare
Photographing badgers at dusk without a hide is a test of patience, humility and attention to detail. Over time you start to read the signs — the rustle of a runway, the pause of a snuffling nose — and those moments become the reward. Keep ethics at the centre of every visit, and your images will not only be better technically, they’ll tell a truer story about these remarkable creatures.